GitHub Enterprise Server
Buildkite can connect to your GitHub Enterprise Server and use the GitHub Status API to update the status of commits in pull requests.
GitHub Enterprise Server is available to Buildkite customers on Pro and Enterprise plans.
This guide was written using GitHub Enterprise version 2.16.3.
Earlier or later versions may have different menus and headings for the OAuth app registration. All of the Buildkite settings will remain the same.
This guide describes the setup for self-hosted GitHub Enterprise Server. GitHub Enterprise Cloud users should refer to GitHub.
Step 1: Register Buildkite as an OAuth app
In your GitHub Enterprise organization settings, select OAuth Apps under Developer Settings:
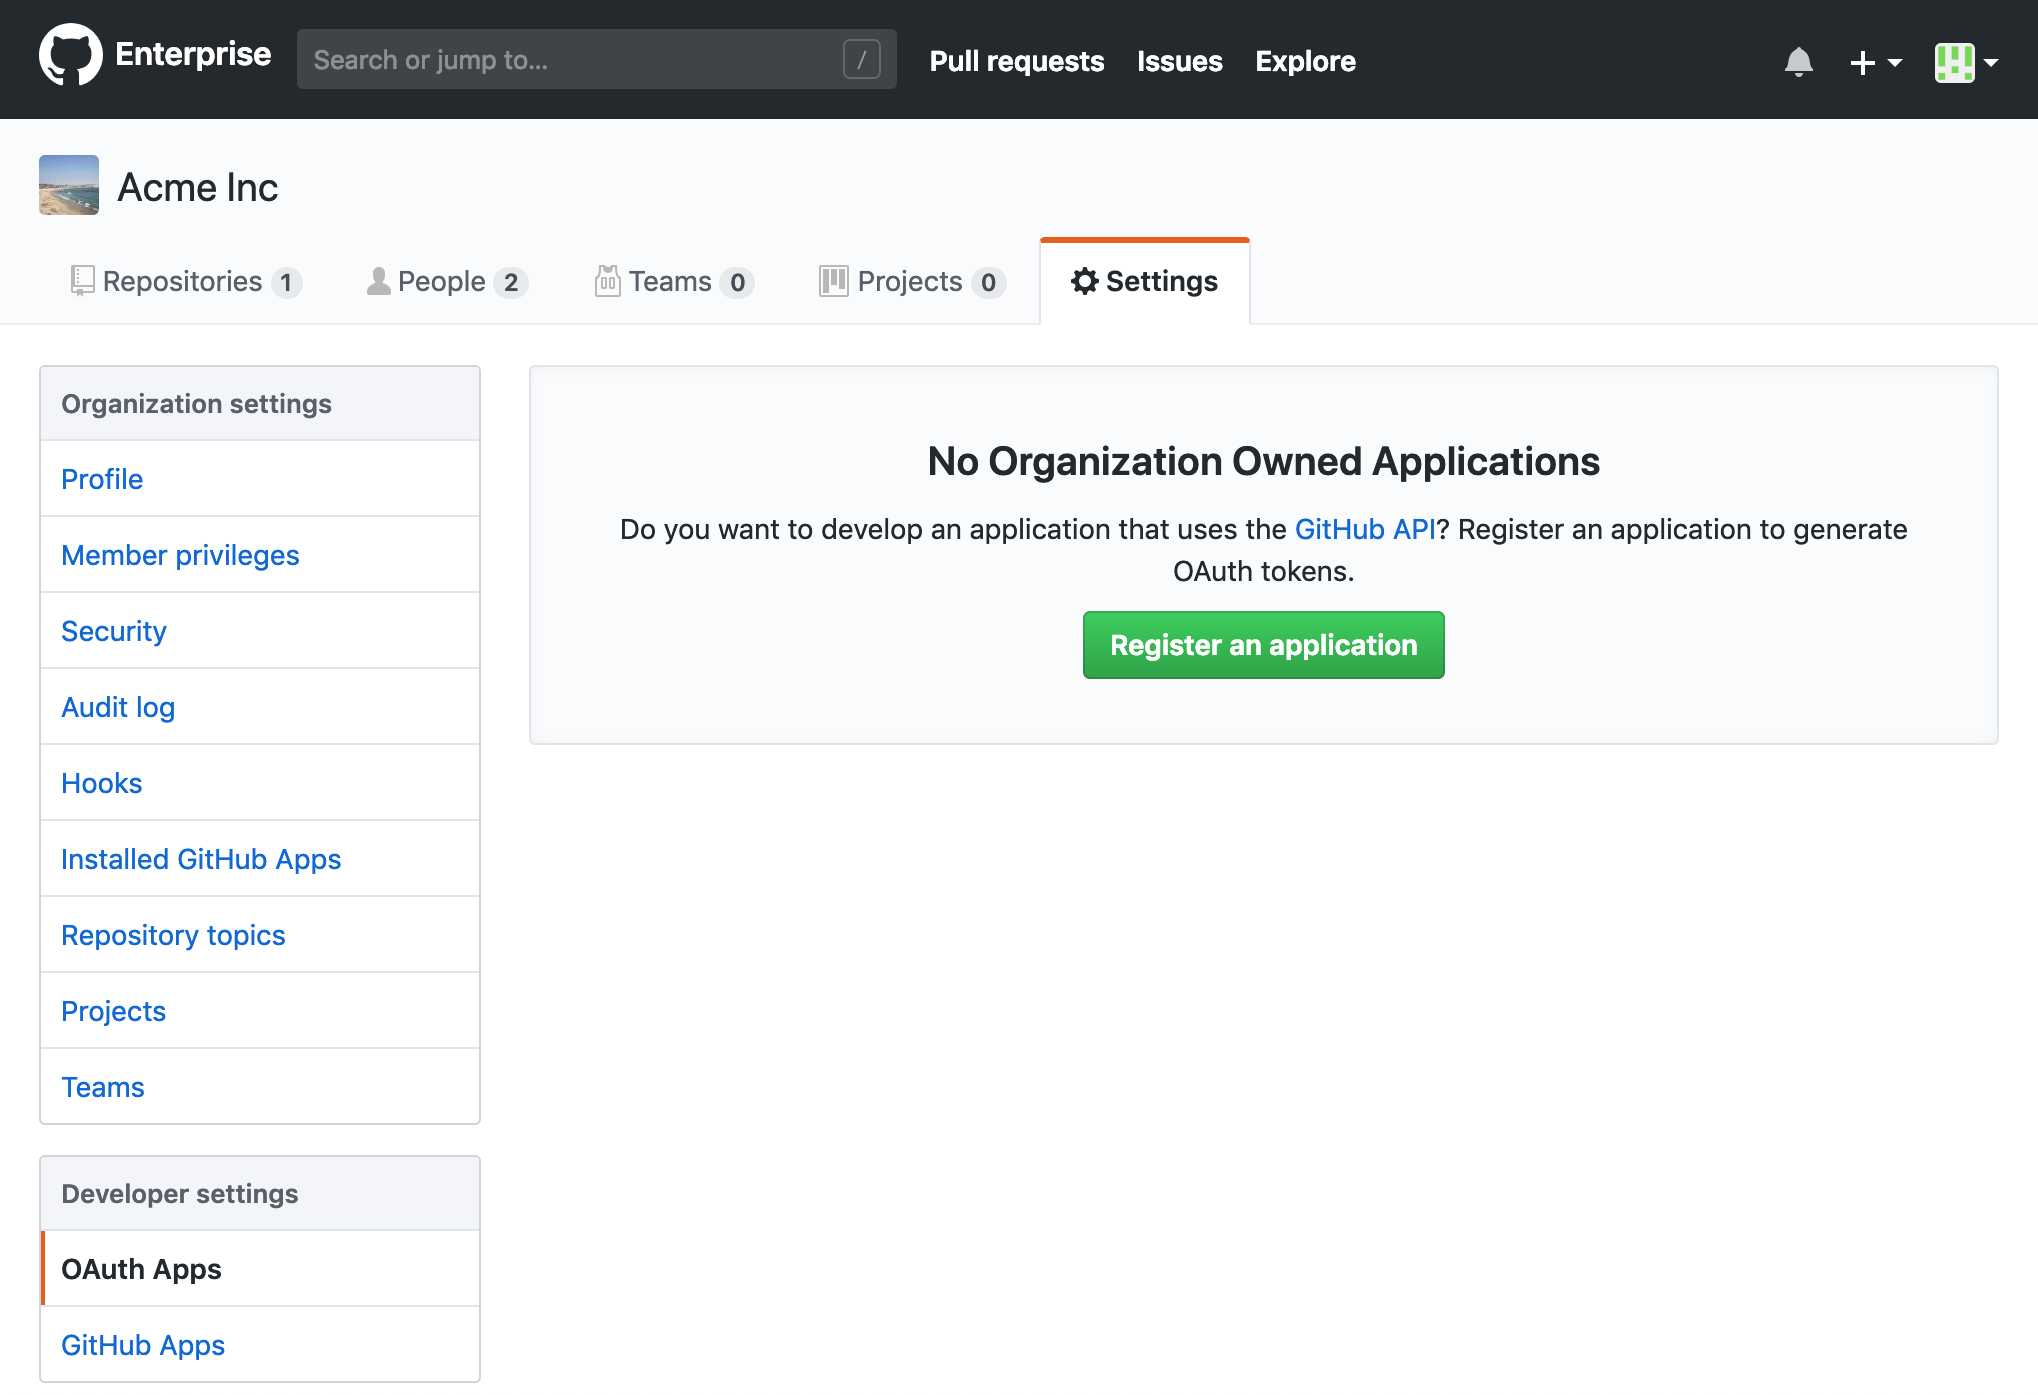
Select Register an application. Fill out the form with the following values:
- Name:
Buildkite - URL:
https://buildkite.com - Callback URL:
https://buildkite.com/user/authorize/github_enterprise/callback
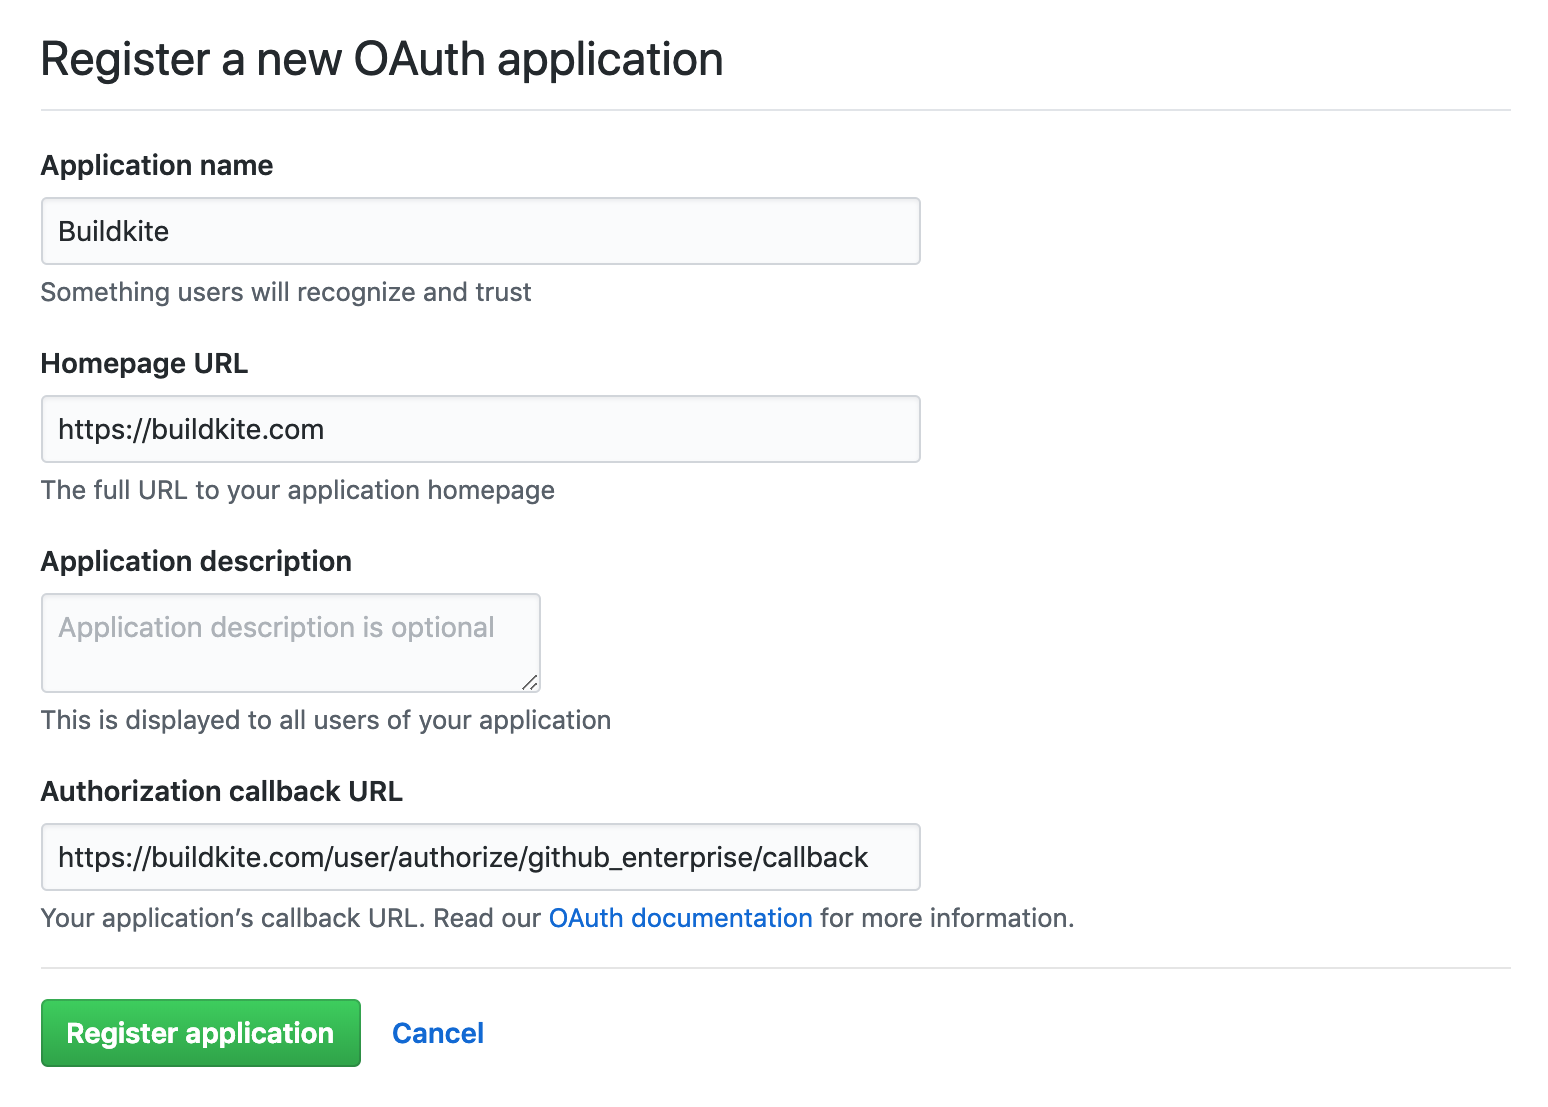
Select Register application at the bottom of the form.
After successfully registering your application, you can optionally add a logo to your app. Here is a pre-cropped image you can use:

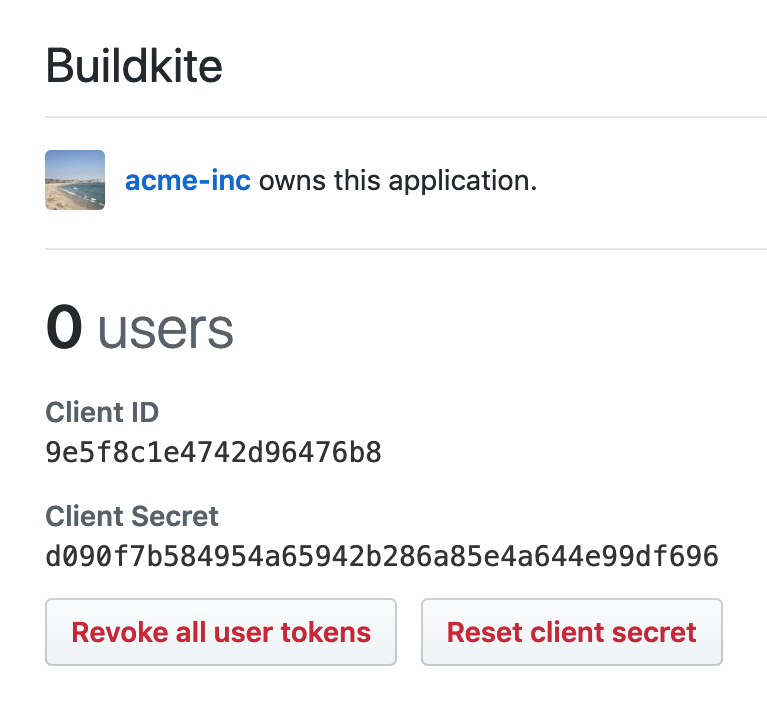
Make a note of your Client ID and Client Secret, you will need those to connect your GitHub Enterprise Server with Buildkite in the next step.
Step 2: Update your Buildkite organization settings
- Open your Buildkite organization's Settings and choose Repository Providers.
- Select GitHub Enterprise Server.
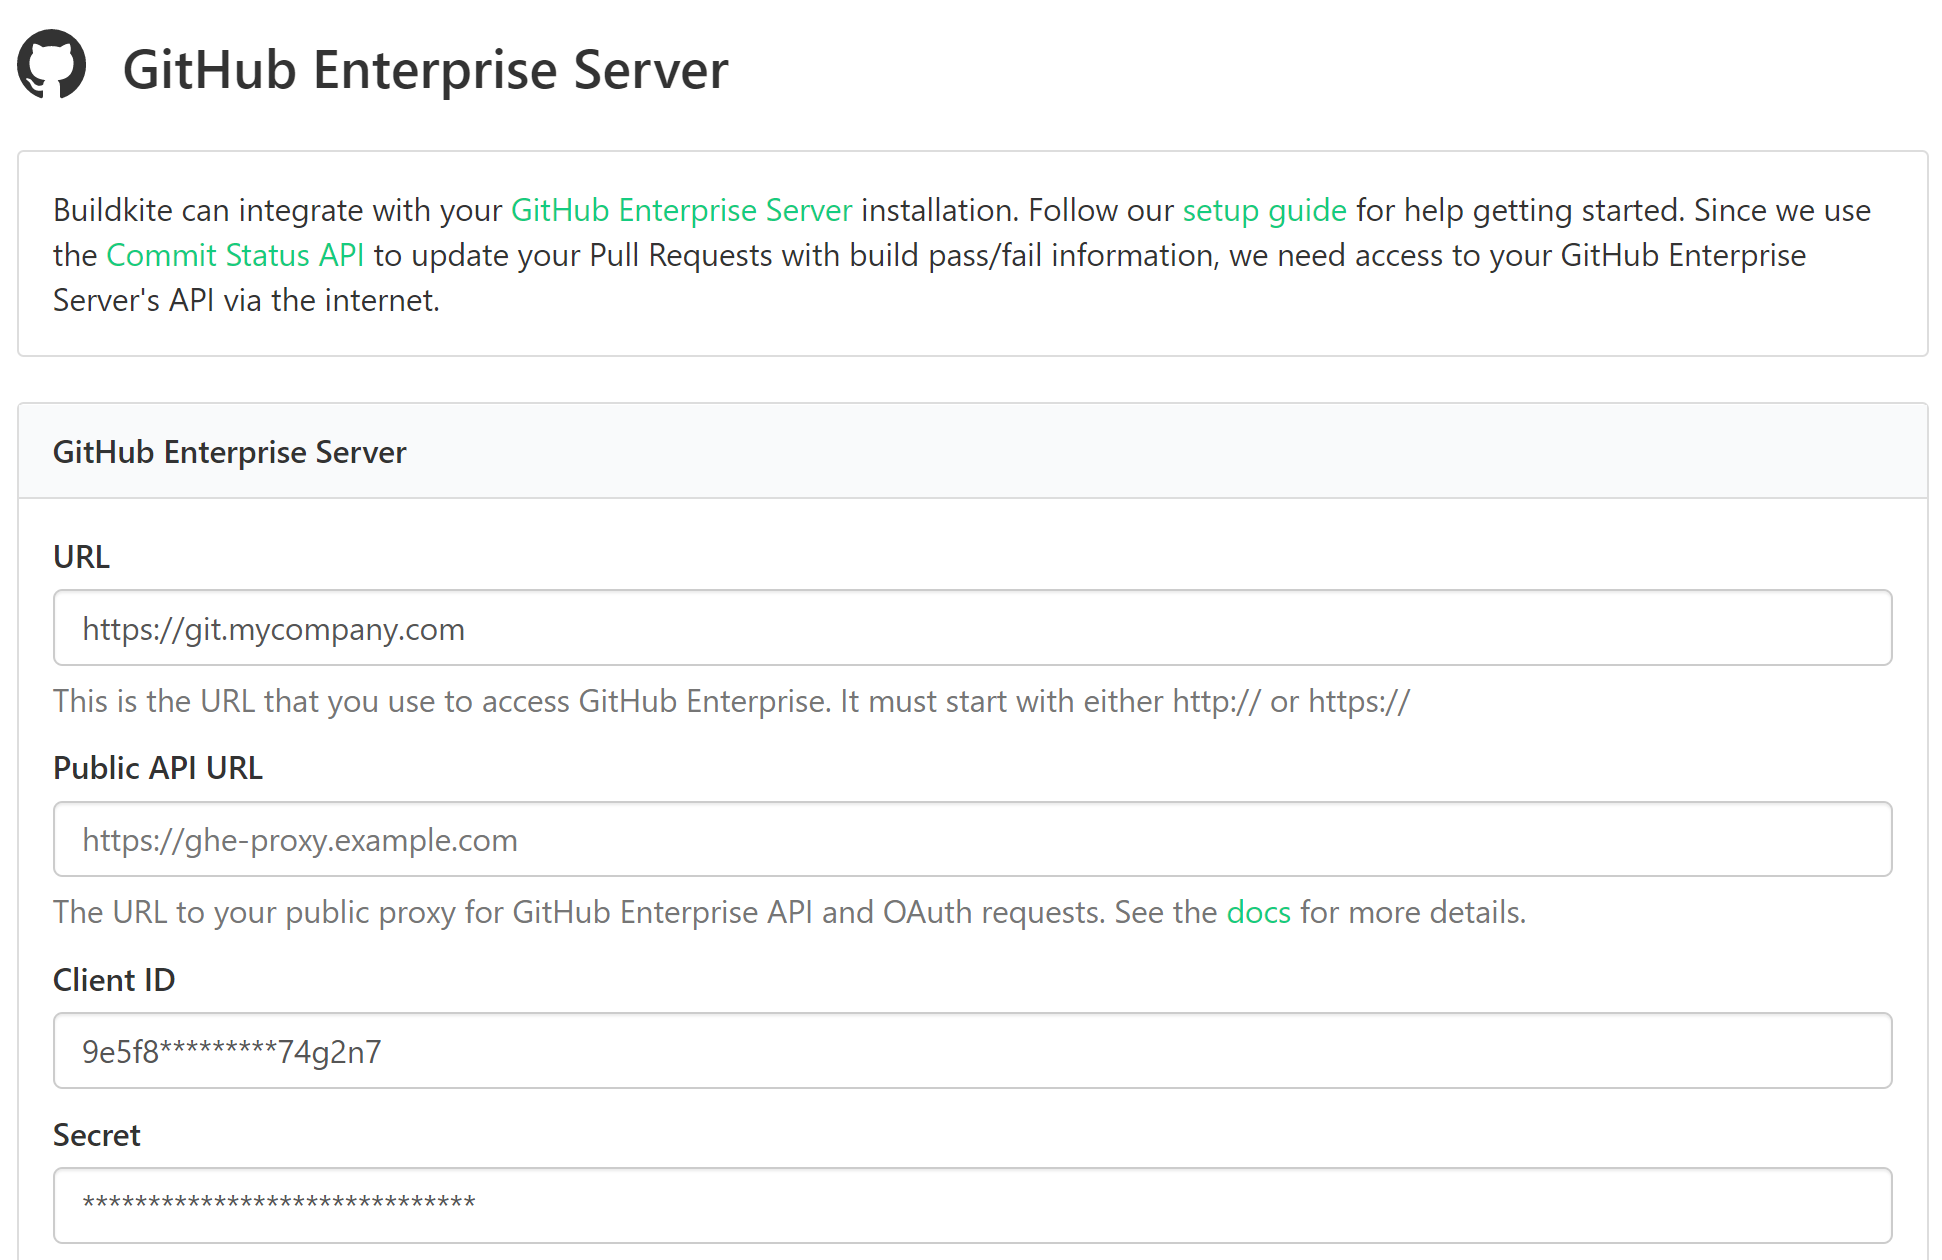
- Enter your settings:
- The URL and public proxy URL of your GitHub Enterprise Server
- The Client ID and Client Secret from the GitHub OAuth App you created in Step 1
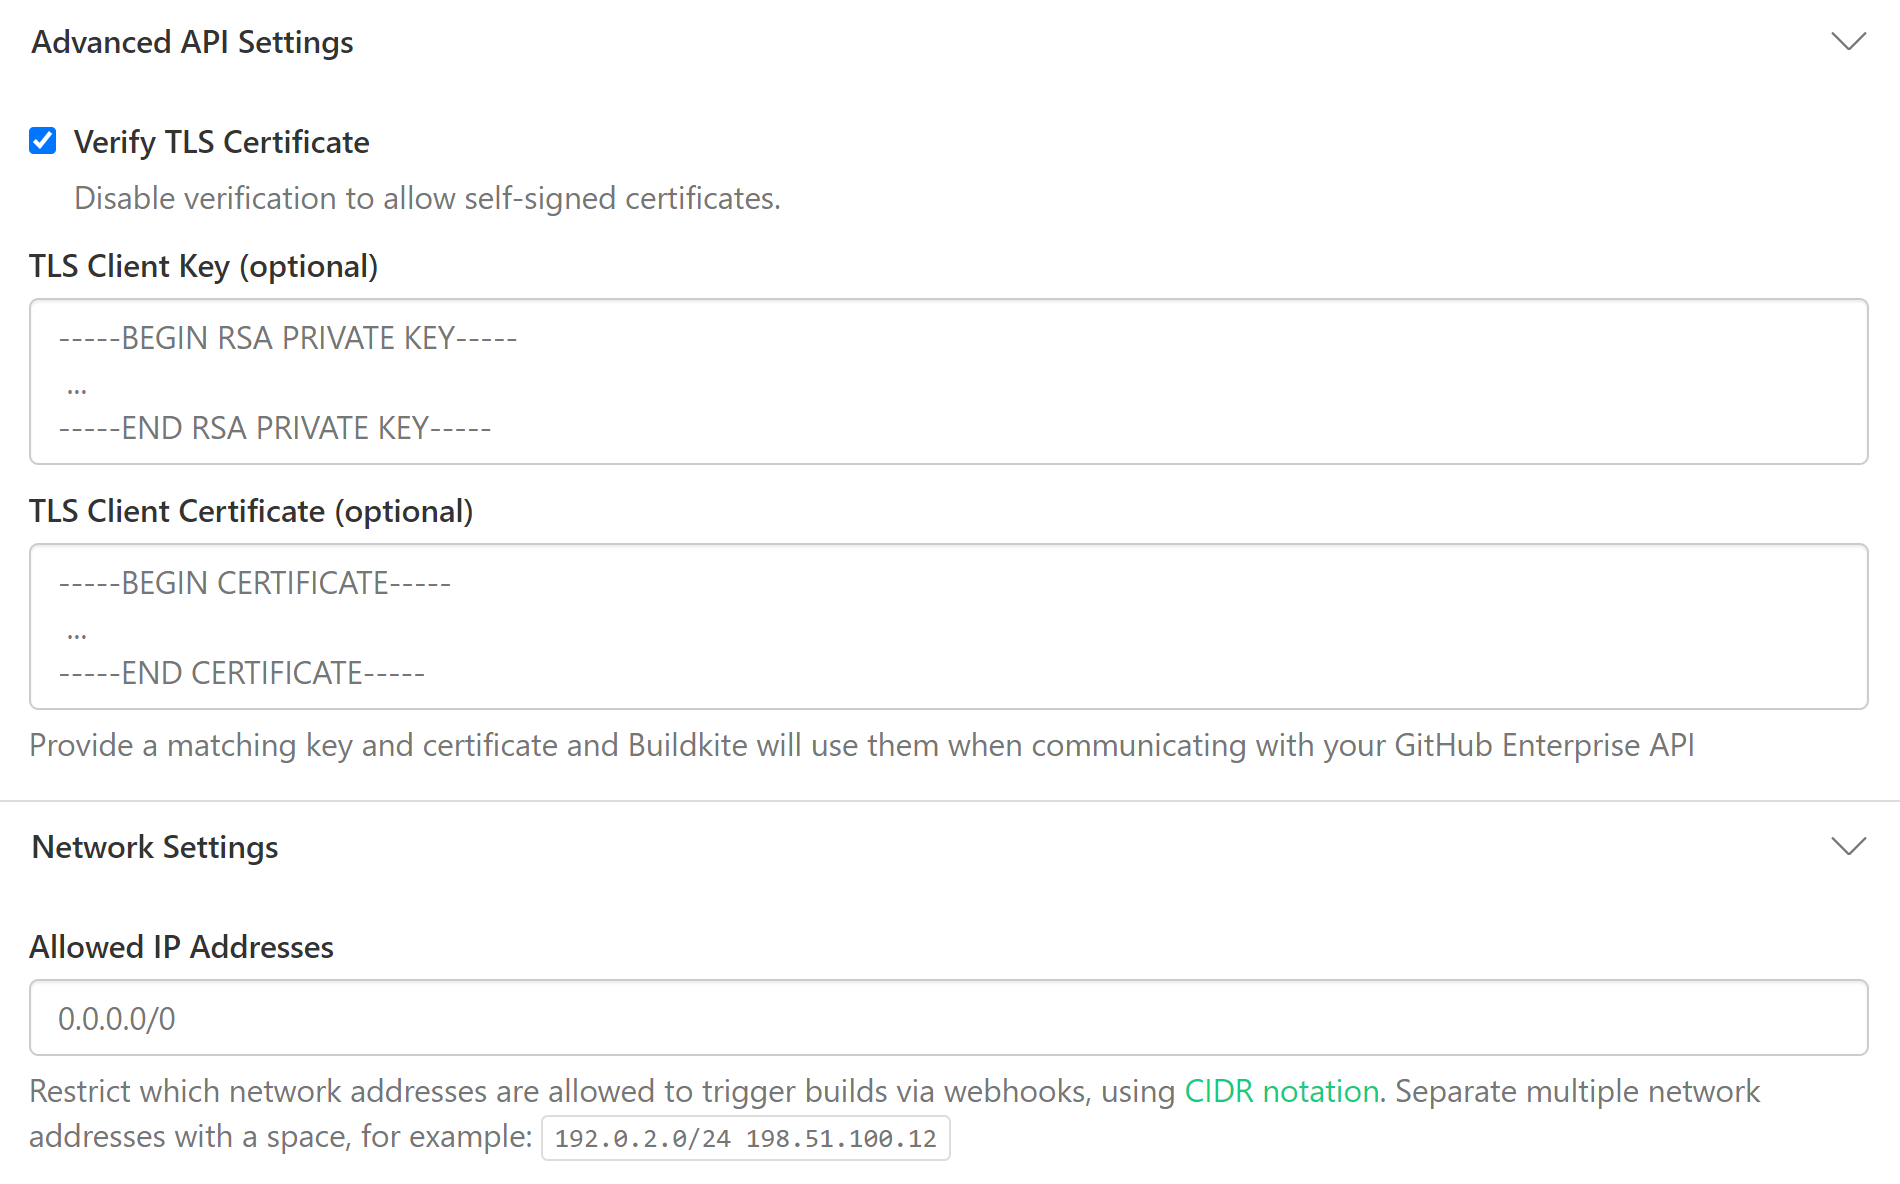
- If you're using self-signed certificates, make sure the Verify TLS Certificate checkbox is not selected.
-
Select Save GitHub Enterprise Settings to save your settings. After saving, the Secret field appears blank. Buildkite has saved it, and will not display it.
You can optionally supply a TLS certificate pair to be used by Buildkite as a client certificate when contacting your GitHub Enterprise endpoints.
Step 3: Connect your GitHub Enterprise account to Buildkite
For Buildkite to mark commits and pull requests as pass or fail, you need to authorize your GitHub Enterprise user account with Buildkite.
- In your Buildkite Personal Settings, select Connected Apps. Here you'll see your GitHub Enterprise Server along with any other connected apps.
-
Select Connect next to GitHub Enterprise:

-
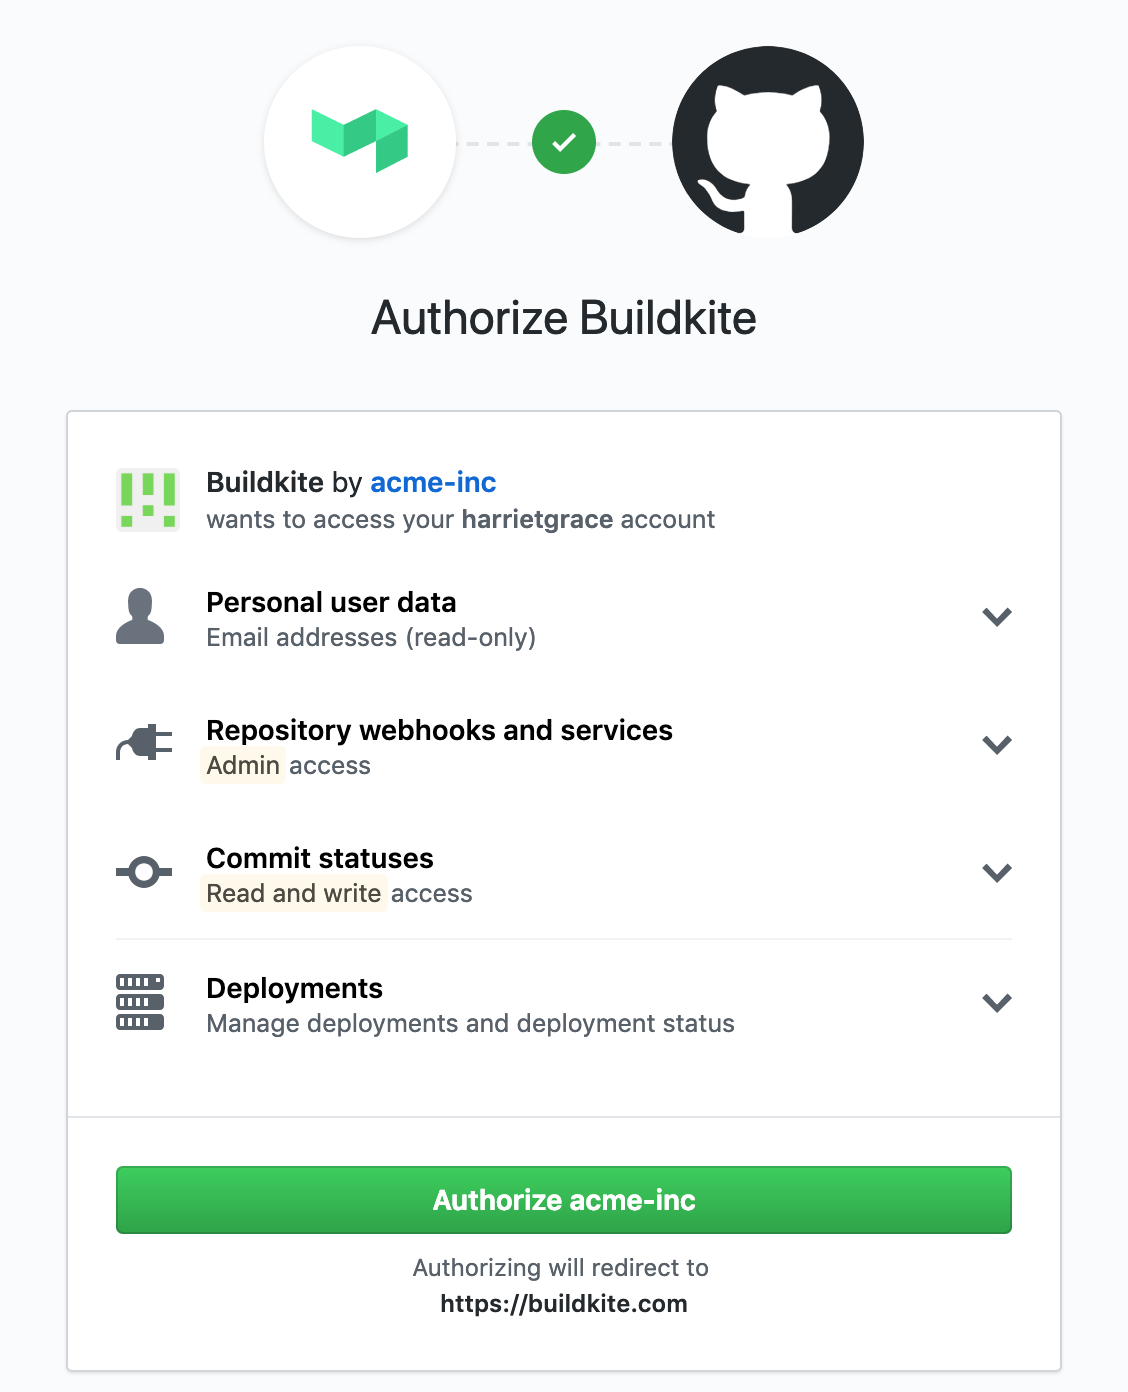
Buildkite redirects you back to your GitHub Enterprise Server, where it asks you to authorize your new Buildkite OAuth app to use your GitHub Enterprise account. Select Authorize to complete your setup:
That's it! Next time you create a pipeline with a repository that's either
https://git.mycompany.com/acme-inc/app.gitorgit@git.mycompany.com:acme-inc/app.git. Buildkite will recognize that it's hosted on your GitHub Enterprise Server, and use your newly created OAuth authorization to update the commit statuses.
Transferring ownership
If you need to leave your current GitHub Enterprise Organization, you need to transfer the OAuth ownership first. Without this, the remaining members of your Buildkite team who are using that GitHub Enterprise Organization for OAuth won't be able to log in.
To correctly transfer the OAuth ownership over your GitHub Enterprise Organization, see GitHub's official documentation for Transferring ownership of an OAuth App and Maintaining ownership continuity for your organization.
Branch configuration and settings
You can edit the version control provider settings for each pipeline from the pipeline's settings page. Go to Pipelines > your specific pipeline > Settings > your Git service provider.
If you need more control over your pipeline configuration, add a pipeline.yml to your repository. Then you can use conditionals and branch filtering to configure your pipeline.
Firewalled installs
If your GitHub Enterprise is behind a firewall you'll need to allow Buildkite's IP address so we can perform OAuth authentications using GitHub Enterprise API to update your pull request statuses.
All Buildkite network traffic to your GitHub Enterprise Server will come from a set list of IP addresses. As the IP addresses are subject to change, it is best to retrieve them directly from the Meta API endpoint. Please configure your network to allow traffic from all IP addresses returned by the endpoint.
For additional security you can create a proxy that allows only the API endpoints we require:
/api/v3/repos/.*/.*/statuses/api/v3/user/api/v3/user/emails/login/oauth
The following is an example NGINX server configuration that proxies the required URLs and can be used with the Public API URL GitHub Enterprise setting in Buildkite:
daemon off;

events {
  worker_connections 1024;
}

http {

  server {
    listen 443 ssl;

    location / {
      # Your own IPs
      allow ...;

      deny all;
    }

    location ~ ^/api/v3/repos/.*/.*/statuses {
      proxy_pass https://ghe.internal:443;

      # Allow for OAuth Buildkite App to update commit statuses
      # IPs Subject to change - https://buildkite.com/docs/apis/rest-api/meta#get-meta-information
      allow 100.24.182.113;
      allow 35.172.45.249;
      allow 54.85.125.32;

      deny all;
    }

    location = /api/v3/user {
      proxy_pass https://ghe.internal:443;

      # Allow for OAuth Buildkite App
      # IPs Subject to change - https://buildkite.com/docs/apis/rest-api/meta#get-meta-information
      allow 100.24.182.113;
      allow 35.172.45.249;
      allow 54.85.125.32;

      deny all;
    }

    location = /api/v3/user/emails {
    proxy_pass https://ghe.internal:443;

    # Allow for OAuth Buildkite App
    # IPs Subject to change - https://buildkite.com/docs/apis/rest-api/meta#get-meta-information
    allow 100.24.182.113;
    allow 35.172.45.249;
    allow 54.85.125.32;

    deny all;
    }

    location /login/oauth {
      proxy_pass https://ghe.internal:443;

      # Allow for OAuth Buildkite App to authorize
      # IPs Subject to change - https://buildkite.com/docs/apis/rest-api/meta#get-meta-information
      allow 100.24.182.113;
      allow 35.172.45.249;
      allow 54.85.125.32;

      # Your own IPs
      allow ...;

      deny all;
    }

  }
}
Learn more about restricting access to your GitHub Enterprise Server on firewalled or proxy services in Restricting Access to Proxied TCP Resources of the NGINX Docs.
Multiple GitHub Enterprise integrations
You can set up multiple GitHub Enterprise integrations with your Buildkite organization. However, due to the OAuth installation requirements, each integration must be configured by a unique user. Each user must possess admin permissions in both Buildkite and GitHub.
Using one repository in multiple pipelines and organizations
If you want to use the same repository in multiple pipelines (including pipelines in different Buildkite organizations), you need to configure a separate webhook for each pipeline. Follow the webhook setup instructions in the Buildkite UI. Buildkite shows you these instructions when you create the pipeline, but you can also find them in Pipeline > your specific pipeline > Settings > your Git service provider > your Git service provider's Setup Instructions.
If you want to integrate the same repository into multiple Buildkite organizations, you need to link each organization to GitHub using different Buildkite user accounts. You must use different user accounts because there's a one-to-one relationship between a Buildkite user and a GitHub user. The user needs admin permissions on the GitHub organization to link it to Buildkite. You can only install the Buildkite app for GitHub once per GitHub organization.
Build skipping
You may not always want to rebuild on every commit, or branch. You can configure Buildkite to ignore individual commits or branches, or to skip builds under certain conditions.